
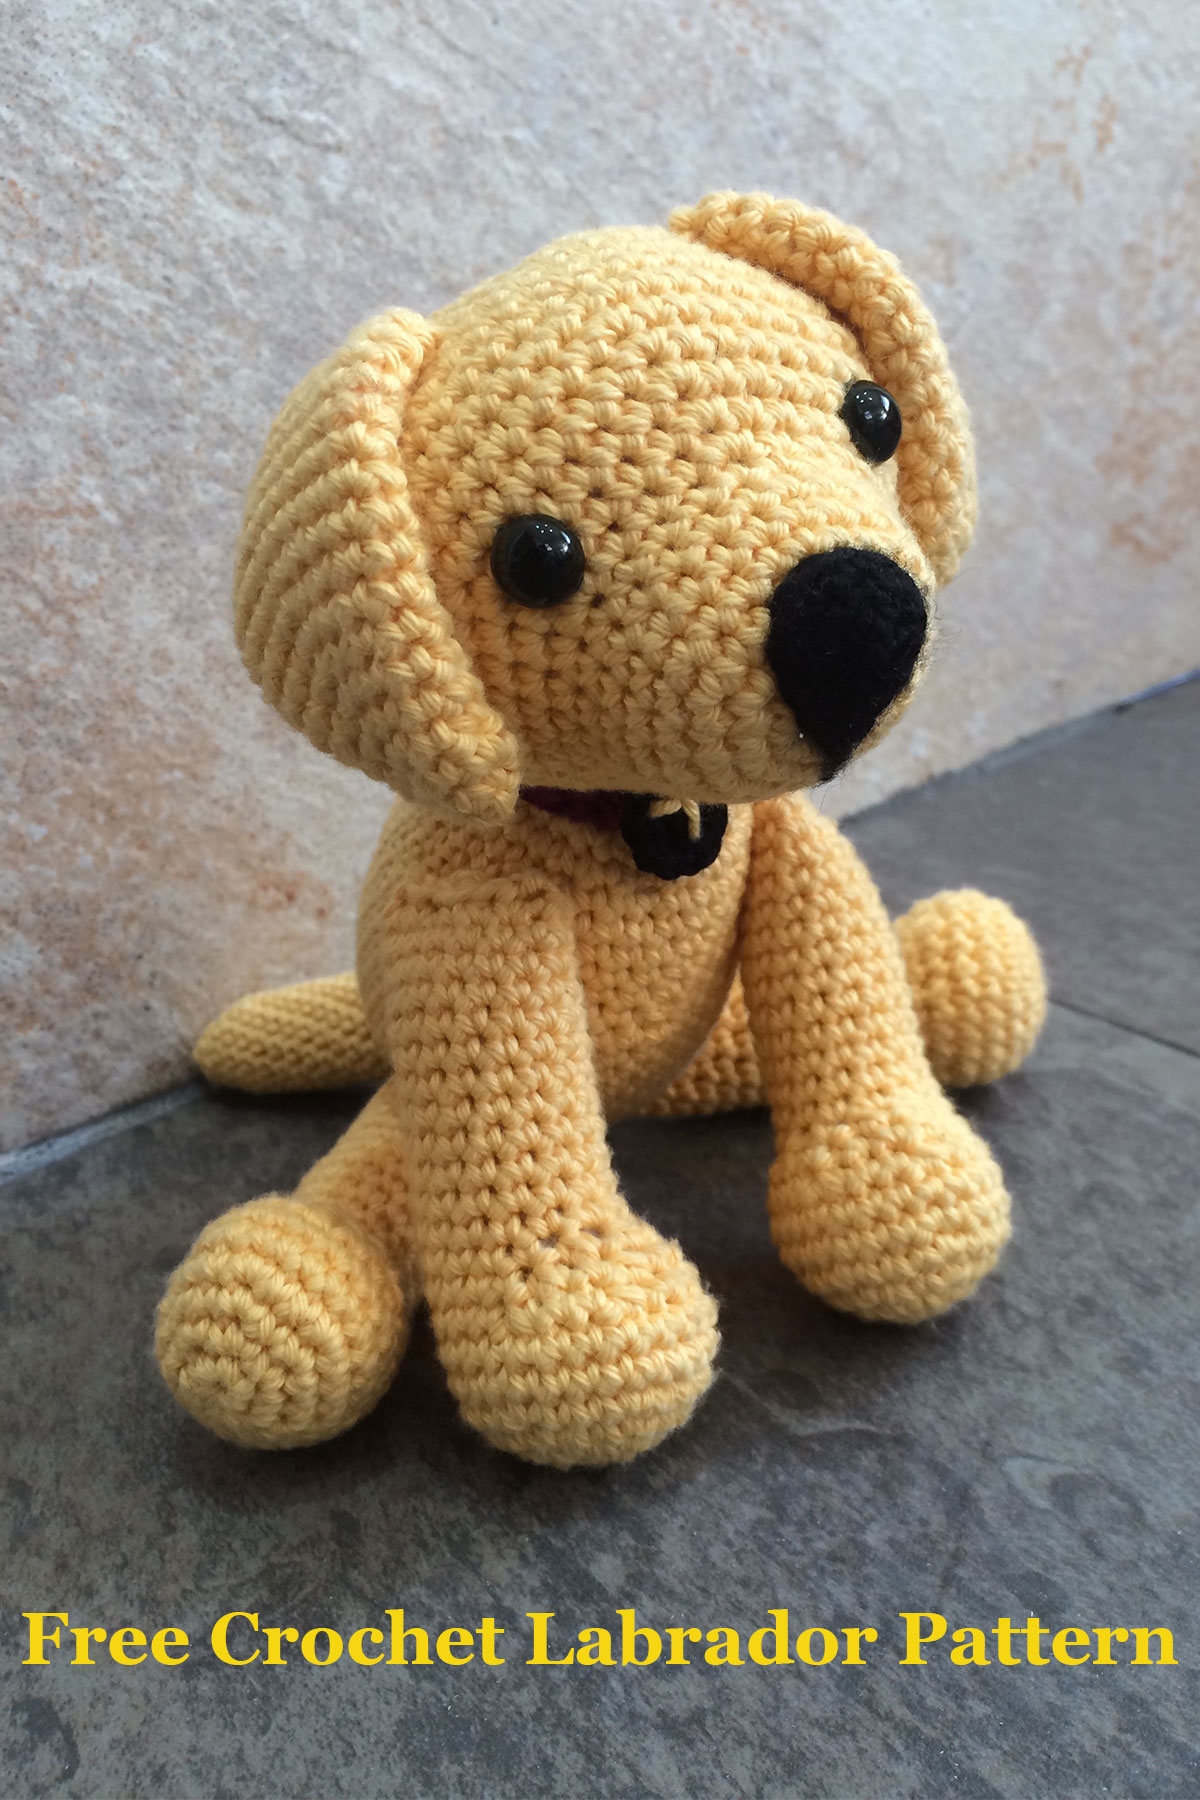
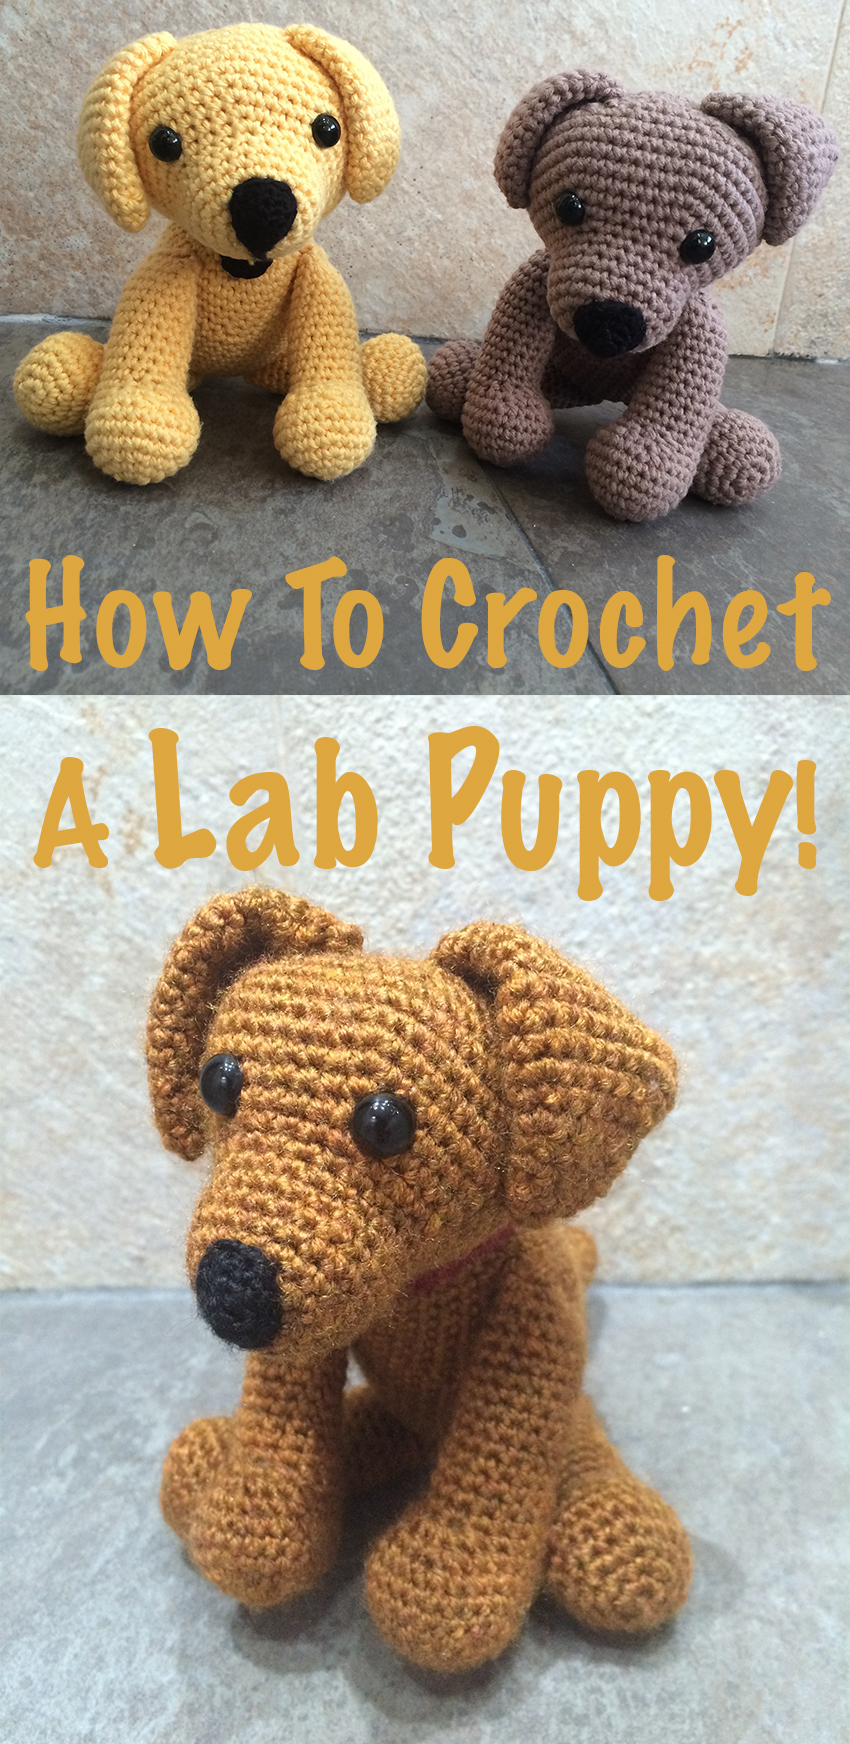
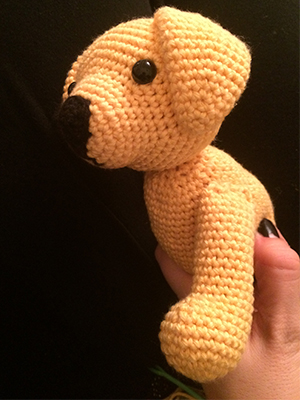
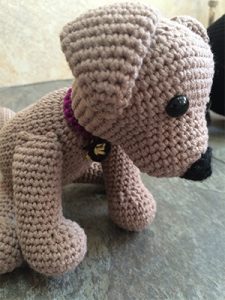
In this article I am going to share with you some simple instructions for how to make your own crochet Labrador. Would you like your very own handmade replica of your Labrador? A cute copy of your adorable pup, to proudly display in your home? The pattern below is for the yellow Lab puppy shown in the picture here, but you can adapt it to match your dog perfectly.
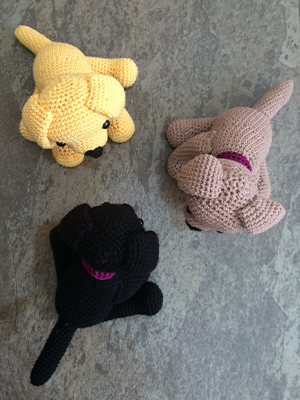
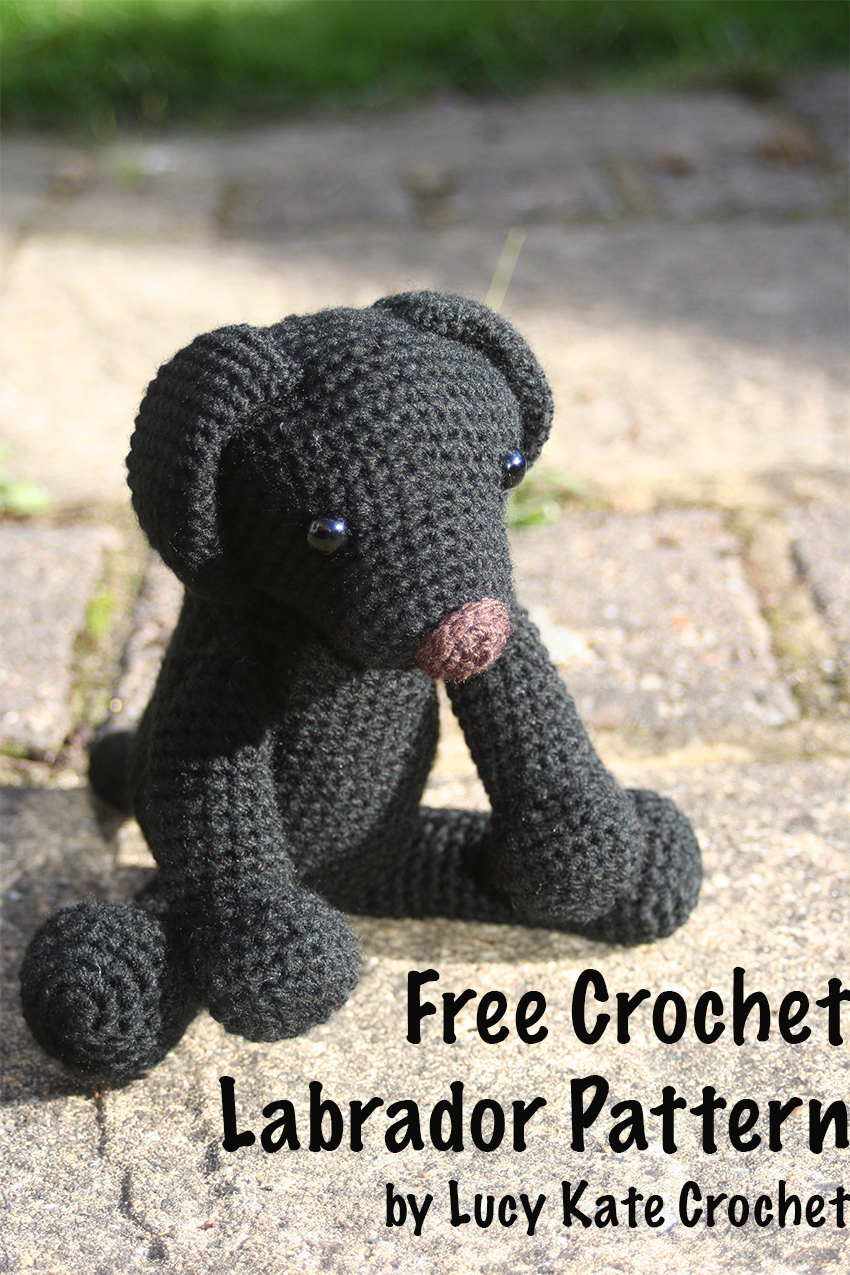
The black and chocolate dogs are slight variants on this pattern to give different looks to the puppy. If you want to make your own handmade crochet Labrador puppy toy you can find out how to do so with the easy instructions below.
Crochet Labrador Puppy Pattern
Each crochet Labrador you make will have it’s own unique style, which will vary depending on the color and type of yarn you use.
 Looking for a darker shade of chocolate or yellow, or even to reflect your Lab’s larger ears or adorably big puppy feet, then just adjust the pattern. You can ask for help in the comments section below if you get stuck. But the really fun part is making the toy yourself. So why not give it a go? Even if you are brand new to crochet, there are instructions to help you get started.
How To Make A Crochet Labrador
If you are new to crochet, then check out this article to get to grips with the basic techniques before you begin your Crochet Labrador. For help with reading patterns, you might find this crochet abbreviations information useful as well.
Crochet Labrador Puppy Equipment
To make your own crochet Lab puppy you will need the following equipment.
Main Body Yarn
Your choice of main yarn will depend upon which color crochet Lab you want to create.
 (paid link)
Choose only one of the following:
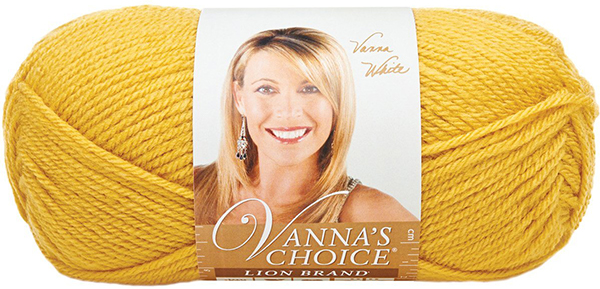
- 100g yellow aran yarn(paid link)
- 100g light brown yarn(paid link)
- 100g dark brown yarn(paid link)
- 100g black aran yarn(paid link)
Other Yarn
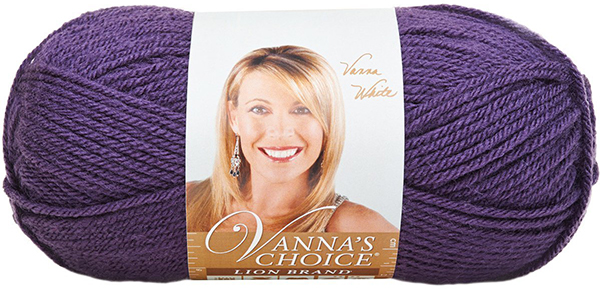
- 25g purple yarn(paid link) for the collar
- 25g of black yarn(paid link) for the nose and mouth
 (paid link)
Other Supplies
- safety eyes(paid link)
- Size E / 3.5mm crochet hook(paid link)
- stitch marker(paid link)
- sharp scissors(paid link)
- yarn needle(paid link)
- toy stuffing(paid link)
If you are new to crochet, you might want to buy a complete starter kit (paid link)to get you going.
 (paid link)
You can also buy crochet equipment from hobby stores. To follow this pattern it doesn’t matter which color yarn you choose, as long as the yarn weight is the same.
 (paid link)
Most equipment can be found online through their websites or through Amazon. There are also a wealth of independent craft shops to be stumbled upon locally, where the prices are often a little higher, but you can find some fantastic quality unique yarns.
Crochet Labrador Puppy Pattern
Your crochet Lab will be worked in a circular pattern, building from a magic circle. Each section of the Lab will be made individually, then sewn together when complete.
The total number of stitches in each row will be shown in brackets at the end of the instructions. I recommend using a stitch marker to help you keep count of your stitches as you go. If you don’t have any stitch markers then you can use a small piece of yarn to mark your place instead.
 Please note: my crochet patterns are always written using US terminology. If you are already keen on crochet but use the UK terminology, just have a quick check with this crochet terminology conversion chart before you begin.
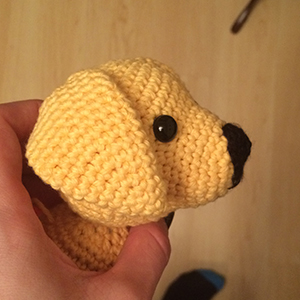
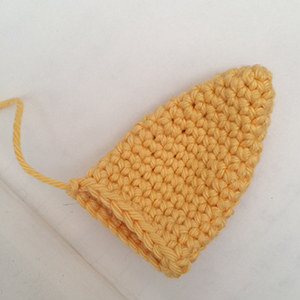
Crochet Lab Head
Row 1 – Make a magic circle of 6 stitches (6)
Row 2 – Make 2 single crochets (2sc) into each stitch (12)
Row 3 – Put 1 single crochet (1sc) into the first stitch, and 2 single crochets (2sc) into the next. (1sc, 2sc) Repeat six times (18)
Row 4 – Put 1sc into the first two stitches, 2 sc into the next. (1sc x 2, 2sc) Repeat six times (24)
 Row 5 to 9 – Make 1sc in each stitch (24)
Row 10 – (1sc x 3, 2sc) Repeat six times (30)
Row 11 – (1sc x 4, 2sc) Repeat six times (36)
Row 12 – (1sc x 5, 2sc) Repeat fives times. Then make 1sc in each stitch for the final 6 stitches (41)
Row 13 – (1sc x 6, 2sc) Repeat fives times. Then make 1sc in each stitch for the final 6 stitches (46)
Row 14 – (1sc x 7, 2sc) Repeat fives times. Then make 1sc in each stitch for the final 6 stitches (51)
Row 15 to 17 – Make 1sc in each stitch (51)
Row 18 – Put 1sc into the first seven stitches, then sc the next two stitches together. (1sc x 7, sc2tog) Repeat fives times. Then make 1sc in each stitch for the final 6 stitches (46)
Row 19 – (1sc x 6, sc2tog) Repeat fives times. Then make 1sc in each stitch for the final 6 stitches (41)
Row 20 – (1sc x 5, sc2tog) Repeat fives times. Then make 1sc in each stitch for the final 6 stitches (36)
Row 21 – Make 1sc in each stitch (36)
Row 22 – (1sc x 4, sc2tog) Repeat six times (30)
Row 23 – (1sc x 3, sc2tog) Repeat six times (24)
Take two safety eyes and attach them just beyond the crochet Labrador puppy’s muzzle.
Row 24 – (1sc x 2, sc2tog) Repeat six times (18)
Fill the head with toy stuffing. Do not overstuff, make sure you can gently squeeze the head and that stuffing is not separating or poking through the stitches.
Row 25 – (1sc, sc2tog) Repeat six times (12)
Row 26 – sc2tog six times, then thread your yarn needle and sew the head closed. Leave a long string of yarn for attaching the head to the body later.
Crochet Labrador Nose
To make your crochet Labrador a nose you will need to make a small separate circle using your black yarn.
 Row 1 – Make a magic circle of three stitches (3)
Row 2 – Put 2sc into each stitch (6)
Row 3 – Put 1sc into the first stitch, then 2sc into the next. Repeat for the round (9)
Using your yarn needle, sew your small black circle onto the end of your muzzle. Place it slightly higher than the centre starting point and between the position of the eyes. You can also sew on any mouth features you want below the nose, using your threaded yarn needle.
Crochet Labrador Ears
You will need to make two crochet Lab ears for your toy. Using the same colour as their body, and working from a magic circle again in a circular pattern.
Row 1 – Make a magic circle of 3 stitches (3)
Row 2 – Make 2 single crochets (2sc) into each stitch (6)
Row 3 – Put 1sc into the first stitch, and 2sc into the next. (1sc, 2sc) Repeat three times (9)
 Row 4 – Put 1sc in each stitch (9)
Row 5 – (1sc x 2, 2sc) Repeat three times (12)
Row 6 – Put 1sc in each stitch (12)
Row 7 – (1sc x 3, 2sc) Repeat three times (15)
Row 8 – Put 1sc in each stitch (15)
Row 9 – (1sc x 4, 2sc) Repeat three times (18)
Row 10 to 17 – 1sc in each stitch (18)
When finished do not stuff, simply sew the bottom of the ear closed in a line.
Crochet Labrador Body
To make the crochet Lab’s body, follow the same circular pattern as the head. Using your 3.5mm crochet hook and yellow yarn.
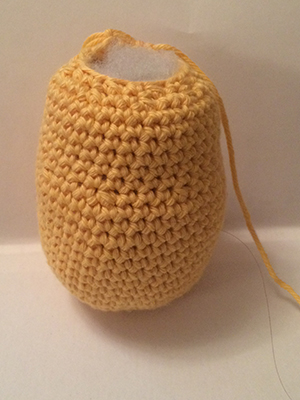 Row 1 – Make a magic circle of 8 stitches (8)
Row 2 – Make 2 single crochets (2sc) into each stitch (16)
Row 3 – Put 1 single crochet (1sc) into the first stitch, and 2 single crochets (2sc) into the next. (1sc, 2sc) Repeat eight times (24)
Row 4 – Put 1sc into the first two stitches, 2 sc into the next. (1sc x 2, 2sc) Repeat eight times (32)
Row 5 – (1sc x 3, 2sc) Repeat eight times (40)
Row 6 to 17 – Make 1sc in each stitch (40)
Row 18 – Now begin to decrease the circles. (1sc x 3, sc2tog) Repeat eight times (32)
Row 19 to 26 – Make 1sc in each stitch (32)
Row 27 – (1sc x 2, sc2tog) Repeat eight times (24)
Fill the body with toy stuffing
Row 28 – (1sc, sc2tog) Repeat eight times (16)
Row 29 – sc2tog eight times, then thread your yarn needle and sew the head closed. Leave a long string of yarn for attaching the body to the head later.
Crochet Labrador Legs
To make your Labrador feet and legs, following the instructions below four times. For this pattern the front and back legs are identical, but they are closed and attached differently.
Row 1 – Make a magic circle of 6 stitches (6)
Row 2 – Make 2 single crochets (2sc) into each stitch (12)
Row 3 – 1sc into the first stitch, and sc into the next. (1sc, 2sc) Repeat six times (18)
 Row 4 – (1sc x 2, 2sc) Repeat six times (24)
Row 5 to 6 – Make 1sc in each stitch (24)
Row 7 – Make 1sc in the first 12 stitches (sc x 12), then (1sc x 2, sc2tog) three times (21)
Row 8 – (1sc x 12), then (1sc, sc2tog) three times (18)
Row 9 – (1sc x 12), then sc2tog three times (15)
Row 10 to 23 – Make 1sc in each stitch (15)
To close – for the front legs sew closed in the direction of heel to toe. For the back legs, sew closed at a right angle to the front legs, from side to side. Leave a long strand of yarn from each finished leg for sewing together later.
Crochet Labrador Tail
Row 1 – Make a magic circle of 3 stitches (3)
Row 2 – Make 2 single crochets (2sc) into each stitch (6)
Row 3 – Put 1sc into the first stitch, and 2sc into the next. (1sc, 2sc) Repeat three times (9)
Row 4 – (1sc x 2, 2sc) Repeat three times (12)
Row 5 – (1sc x 3, 2sc) Repeat three times (15)
Row 6 to 19 – Make 1sc into each stitch (15)
Row 20 – Make 1sc in the first seven stitches, then 2sc in each of the last 8 (22)
 (paid link)
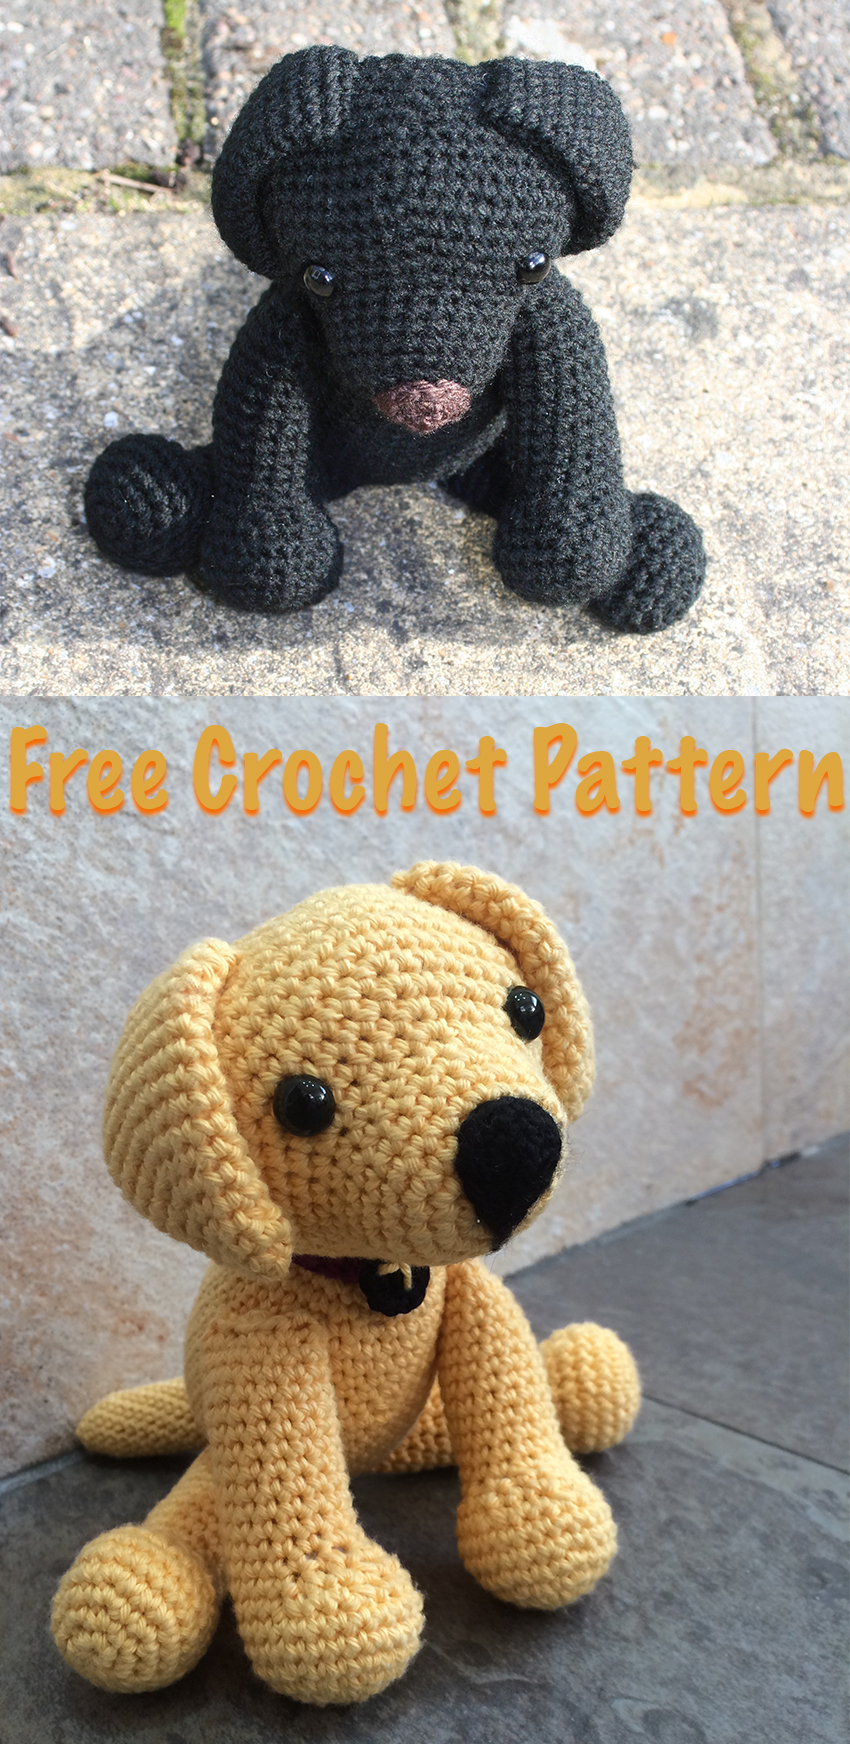
Sewing Your Crochet Labrador Together
To sew your crochet Labrador together use the yarn threads you left when you closed each section. Make sure to use fine stitches, weaving through each corresponding crochet stitch to firmly attach the segments together. Position the front legs at either side of the chest, and the back legs under the bottom. This will give your puppy a canine style seated position when you put him down.
Crochet Labrador Puppy Collar
I have given my Labrador puppies collars. To make them you will need to use your purple yarn to begin with.
 Make a chain of twenty one stitches. Starting from the third stitch from the hook, make a single crochet into each stitch. At the end of the row tie off.
To make the collar tag, make a magic circle of four stitches, and put two single crochets into each stitch of the circle. Tie off and sew the tag onto the collar using the loose thread of yarn.
You can then sew the first initial of your Lab’s name onto the collar to make it even more your own!
Your Personalised Crochet Labrador Puppy
When you make your own crochet Lab puppy using the instructions above, you will find that he looks like the yellow Lab pup in the pictures. But I am a big fan of taking an existing pattern and giving it a unique twist. The easiest way to adapt the pattern is to add or remove rows.
Think your Labrador has longer legs? No problem, just add a few rows to the length. Want to give him shorter ears? Then just take a row off the length there instead.
You can also use different coloured yarns to reflect his shade, although I highly recommend staying with the same yarn type. Different types or ‘weights’ of yarn give different stitch sizes and finishes to the toy.

The Labrador Site Founder

Pippa Mattinson is the best selling author of The Happy Puppy Handbook, the Labrador Handbook, Choosing The Perfect Puppy, and Total Recall.
She is also the founder of the Gundog Trust and the Dogsnet Online Training Program
Pippa's online training courses were launched in 2019 and you can find the latest course dates on the Dogsnet website


I changed the ears up to mock a boarder collie and it still looks amazing. I’ve also made the pattern exactly the same for a golden retriever and it looks fantastic too.
Awesome pattern. I used cotton garn and a 2mm hook works perfectly.
How is this assembled? I made all the pieces for a gift next week, and have no idea how to put it together. I read through all the comments and noticed several others have asked the same question. Will I receive a private response, or will the website get updated with further instructions?
You mentioned that the yarn weight needs to be the same…is 100g the weight of the yarn (like, size 2/sport) or the amount (like, the correct yardage would weigh that much)? I guess I’m confused because a 3.5 mm crochet hook works best with size 2 yarn, but all the yarn links are for size 4 yarn.
Hi Lucy I read all the comments but I didn’t see one reply on how to assemble this labrador puppy it would be deeply appreciated since I have all the parts done and stuff. I thank you in advance
Hello,
Thank you for such a cute pattern! I made a black one for my sister-in-law with matching bandanas for her actual dog – she LOVED it. I’m looking to start my own Etsy shop. If I credit you as the designer, can I sell these? Thank you!
Hi! I love this pattern! Is there any way to make it closer to a golden, making a fluffy ears/chest/tail? Thanks!!
Get a wire brush at hardware store (or you can try a pet brush).
Brush the surface and it will get fuzzy
This is my first stuffed animal that i am making! My only concern is that i am having a difficult time putting the parts together. Is there any video for this or even any instructions.
Hi have you further instructions on sewing the Labrador together please.
What is the finished size? I am using a bulky yarn and trying to determine how big the finished dog might be. I see several people had asked this question but see no response. Thanks again for your pattern.
hey, i just finished this pattern and the finished project is about 9 1/2 inches tall.
I have all the parts made but need more instructions on sewing together.
Thank you
Please please if you have a more detailed information on how to assemble it would be most appreciated! Have it all ready to put together but it is not looking like your pictures! Thank you for the pattern!!
Are the legs stuffed. They look like they are but it doesn’t say.
Yes they are stuffed.
Hi! I was looking for a medium size puppy and this looks like it might work. I started one that was going to be way too time-consuming and gave up! Approximately how big is this one? Also, could I use either Red Heart or Red Heart With Love yarn? Thank you so much.
i would like to know how to purchase a yellow lab but first what are the dimensions size
please email me the response with purchasing information. Thank you have a good day
how can I print the Labrador puppy out?
I need help with the tail-do you stuff it? What is the point of the raided edge? How do I sew it on?
Are the instructions for the tail complete? It looks like the is something missing. Please help?
The tail instructions are complete, but if you want a longer tail then you can add a few extra rows from 19. Hope that helps!
What are pups measurements
Love this pattern but could you give better sewing up instructions please
Will one ball of mustard yarn make one dog or will I need more?
Hi Lucy, I love the pattern ! thank you!
I already made all the parts but I have problem sewing them together. where can i get more help with this? thank you for any help!
my grandson is waiting for that puppy!
ora
Muchas gracias por compartir. Muy fácil de seguir las instrucciones. Es el segundo amigurumi que hago. Ha quedado muy lindo.
What are the approximate dimensions of the finished project please? Thank you.
Love dog but need printable pattern
If you go to https://www.printfriendly.com
Copy and paste this webpage
https://www.thelabradorsite.com/crochet-labrador
Or any other web page that you would like to print off and you should be able to get a printable version. It’s worked for me with a few crochet patterns that I have wanted to print off. Hopefully it will work for you to.
I have just tried with this pattern and it has worked perfectly Xx
Thank you so much for sharing this wonderful lab pattern. My chocolate lab is very old and sick. I’m afraid we don’t have much time left with Rupert. I’m going to make one of these for each of us to remember our Roo.
I am also making one of these, my dog has passed last month so I am making one for my dad for Christmas! I am sorry for your loss with your dog 🙁
Thank you for the pattern! I enjoyed making the puppy. The only change I made was using pipsquek yarn. It made a very soft cuddly puppy!
Since the Bernat Pipsqueak yarn is classified as Bulky 5 Did you use smaller size hook? If so what size
Thank you
Kay Bussjaeger
Hi, Lucy.
Thank you for the wonderful pattern! I am in the process of making my first yellow Lab, ready to sew together. However, the top of the neck is much more round to fit the collar you have suggested. It also seems too wide for the head. I used #4 worsted along with 3.5 hook, with a tight crochet. Did I miss something in the neck pattern? I’d love to have a side view picture or more detailed instructions as to where to attach things. Thanks!
Is it possible to get actual instructions on how to put this together? I am VERY frustrated having made all the parts and then find the assembly directions scant at best. I am ready to throw it all away after attempting to attach the back legs three times!! And this is not my first project – just one with the fewest assembly instructions!
Where can I get the chocolate lab version? I can’t seem to find it anywhere
You just use chocolate coloured yarn instead x
Just follow the pattern using chocolate coloured yarn x
Hello,
First of all I want to thank you for sharing your wonderful pattern. I just need a bit of help. I am trying to figure out where to place the eyes. Is it possible that you can tell me which row and where? Following the pattern of the head it is obvious that it is not completely symmetrical so it would be nice to know which part of the head is the top. Thank you very much!
Hi! I made maybe 3 of this beautiful labrador. But I’m doing it again, and I don’t know if this time is because of the yarn or the hook, I have a flat “neck” finishing the body too big compares to the head.. I can’t sew them because they look weird together. What would be my problem with this one? Thanks
I’m just finishing the first leg and I didn’t see an instruction to stuff the legs, do I not stuff the legs?
I’m a beginner crochet-er and I’m finding the pattern fairly easy to follow!
Hi Carolyn, The legs are stuffed, just leave a little empty space at the top before sewing to make sure there is a little flat surface to attach to the body. Hope that helps! Lucy
Thank you Lucy! I finished the dog today and I’m happy with how he turned out!
hi guys, it’s very easy to just copy – paste into a word document and…you have the printing pattern.
i will tried this week and see what is the result.
thank you for shearing with us this pattern!
there’s a typo on the instructions for the tail! the last step says there should be 22 stitches but it’s actually 23!
I am having trouble with the leg pattern…could someone help?
Hi everyone
Why not copy and paste the text of the pattern into a word document? Hey presto! Printable pattern…
Hi there, I’m having a hard time making a magic circle with only three stitches. It doesn’t seem to be enough to reach the first stitch to continue the circle. Any advice?
I find this with a lot of amigurumi patterns – the way I got round it was to make the magic ring using a significantly bigger hook and then use the correct sized hook from round 2 onwards. So long as you pull the loose end tight after you’ve done round 2, it tends to look OK. I found that it sometimes takes a couple of goes to get it looking tidy. If anyone has any more sensible ideas, I’d love to hear them, too…
I ended up doing a chain of 4 or 5 , joined it together & then made 3 sc into it & then went from the pattern that way .
I made a chain of 4 or 5 & slip stitched the ends together . I then made the 3 SC into the circle & then followed the pattern onwards .
hi, can this pattern be crocheted with fur yarn? Thanks
Hi any chance of a printable pattern ?
it’s fab but on my fone hard to follow cheers x
How sweet you are to offer this pattern for free. And also offering so much help. I’m going to try the little cutie. I make toys and hats for the children’s cancer unit in Roanoke, VA. They will love this. I have a hard time finding things for boys. I try to make them small so I’m going to try a 3mm hook.thank you so very much.
Hi Lucy
Do you perhaps have a print friendly version of this pattern I would love to try it, but trying to follow it on my phone is way to difficult. If you could email it to me I would really appreciate it. Thanks thanks
Hi Lucy – love this pattern, I’m making the puppy for a pet therapy group that works with abused children, who want to give each child a toy puppy if he/she has to go into court (where dogs aren’t allowed).
I could really use a bit of advice re sewing together the puppy, mainly re the tail – in the last row of crocheting, the pattern says to increase across 8 stitches so it makes a slightly raised edge – is this supposed to go under the pup’s bottom? or does it help to support the toy if you sew it on with the raised edge uppermost?
does any of that make sense?!